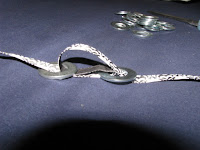
Unbag all the washers.
Sting 2 washers to start. I string my washers on the END at my RIGHT hand. ***I suggest you start in the middle!! Not at the end!*** You may end of 'sliding' the washers all "down" the ribbon some.
Next, you'll want to go BACK thru the first washer. For me, the 1st is the left one.... My washers are going to be strung from the RIGHT.. Heading this way ←.
Next, you're going to go back thru the 2nd washer. {Remember, the end of my string I put the washers ON is always pointing RIGHT.}
Pull the ribbong tight so the washers pull snug right together.
Now it's time the the Third....
Take the end of the ribbon, and loop it thru the 2nd washer.
Now, sting the ribbon back thru the middle of the 3rd washer. And then pull it tight. When pulling the washers tight, you may have to fidget with the ribbon and the washers a little bit. That's an awfully awkward angle to be pulling ribbon back and forth smoothly at, so just ease it where you want it.
Once you figure out the first 3 or so, it goes smoothly. It's just repitition....
Once you figure out the first 3 or so, it goes smoothly. It's just repitition....
I had to slide all the washers down to be about in the middle of the ribbon, when I was done. I'd suggest you start your washers somewhere around the middle of your ribbon, just make sure you have enough on each end to tie.
Ta da!! I like my necklace, cuz it's reversible!!
So cute!!


Be the first to reply!
Post a Comment