Showing posts with label Holiday Things. Show all posts

Friday, April 6, 2012

Easiest Easter Blocks Ever

So I have been the lamest crafter ever. Ok, so I've been crocheting like a mad-woman {cuz I don't have to leave the couch...} hey, my baby has been sick! But I haven't been doing a whole lot of crafting and sewing.

But a while back I went to Target {Oh, I love that store.} And every time I go there I go specifially for the Dollar Section. Well, anyways, while checking the bins in the $1 Section, I found these SPRING blocks.


I had an idea. I'm all about multi-purpose decor, as you can tell by my seasonal word blocks. I counted it out, and there are the same number of letters in EASTER as there are in SPRING. {Yes, I stood there in the aisle and counted the blocks to make sure my idea would work.} So I decided today was the day, 2 days until Easter, and I was finally going to do my project. I measured and cut out the word EASTER in white vinyl.

Then turned the blocks for SPRING around and stuck the vinyl letters on so all I have to do is spin each block around so it says Easter!


Easiest craft ever. Maybe I'll eventually get around to making my St. Patrick's Day/Valentine's Day blocks... Did you know that St. Pat's and Valentine's Day have the same number of letters in them?!

Ta Da! So easy and cute! And those blocks only cost $2.50 in the Dollar Section! Awesome! Now If I can just remember to take them out every year!

Saturday, May 14, 2011

Mother's Day Gifts...Finally

Ok, so since my Mother's Day was overshadowed with electric shock treatments and new double dose shots, I didn't have time to get my Gifts done.

{In reality I probably should have started these the week BEFORE Mother's Day, but my brain has been all over the place. I'm usually on top of these things!}

So, I work at a home decor store. And we've got some pretty cute stuff. I usually don't see what we have until someone brings it up thru the registers. I saw a little hand stictched sign that I fell in love with.

It said : Grandchildren are God's reward for not killing your kids.

My mom makes jokes about living long enough to be a problem to her kids. So I figured this quote would be perfect for her.

I rummaged thru my box of frames. Picked out 2.

I spray painted them white. {I'm usually a black frame person, but my black was gone and I'm pretty impressed with how the white turned out.}

I then cut out the wording in vinyl on my Cricut. {I have over 500 fonts, so this actually took some time. And once I start looking at different fonts, I start to wonder if that's how "reward" is really spelled. Does that happen to anyone else?!}


Next I took a pliers and yanked out the little metal tabs that hold in the backing of the picture, washed the glass and hot glued it into the frame.

I centered my vinyl, and stuck it on.

And since most frames have the "hanger" part on the cardboard backing, I Gorilla Glue'd some ribbon onto the back. {Gluing ribbon on the back makes it hang more even, and it easier to level on a wall.}

I printed out some of the ultrasound pics and put them in a frame to give with the quote.

TA DA!!

Friday, April 1, 2011

Easter Egg Wreath

Are you ready for another wreath?! I know I am! Wanna make one of these :

Well, I'll show you how!

Here's what you need :
  1. Cardboard
  2. 36 Easter eggs
  3. Easter grass
  4. Hot glue
  5. mini eggs (optional)

First, your going to want to trace 2 circles. I used 2 plates. Then, cut them out, so you have a cardboard donut.

Next, start hot gluing plastic Easter eggs on the cardboard donut.

I try to glue 2 rows of eggs. Keep gluing all the way around!

Once you have your cardboard donut covered with plastic eggs, start on the next layer of eggs.

I set the eggs in the middle of 3, where there's a crevice/valley, then hot glue them where they lay.

I also picked out some little mini eggs and I started laying them in between the layers of eggs, to fill in the gaps.

Next, take your Easter grass, and press it in between the gaps in the eggs.

For some of the "harder to reach areas" I used a pencil to squeeze the grass in.

Now, tie a ribbon on, I hot glued it on the back of cardboard to it stays put! Now you're all ready for Easter!!

Thursday, February 17, 2011

Kitty Cats and Airplanes

Wanna know how to make these bad boys?


I'm going to be a guest over at Kitty Cats and Airplanes and show you how!! How cool is that!


Stop over at Amie's blog to check it out! See you there!!

Monday, February 14, 2011

Heart Wreath

Ok, I've made tied-fabrics things before. I've made flip-flops, and I've made wreaths. My favorite is the heart wreath. I'm going to show you have to make one!!

What you'll need :
  1. Lots of fabric strips (I try to cut mine at 1/2"x6")
  2. Thin Heart shape (The Mr made mine out of a wire hanger)
  3. Lots of time!

Ok, I cut my way cute awesome pink, purple, and red fabric into strips. I try to cut them at 1/2"x6", but sometimes I end up cutting at 4.5". Either one works, plus, the different lengths add shape/volume/puff/dimenson. So, cut out lots!!

I showed my shoes, so you could tell just how much fabric I cut. I did NOT use all of it, but cutting lots means you can invite friends over to make some too!

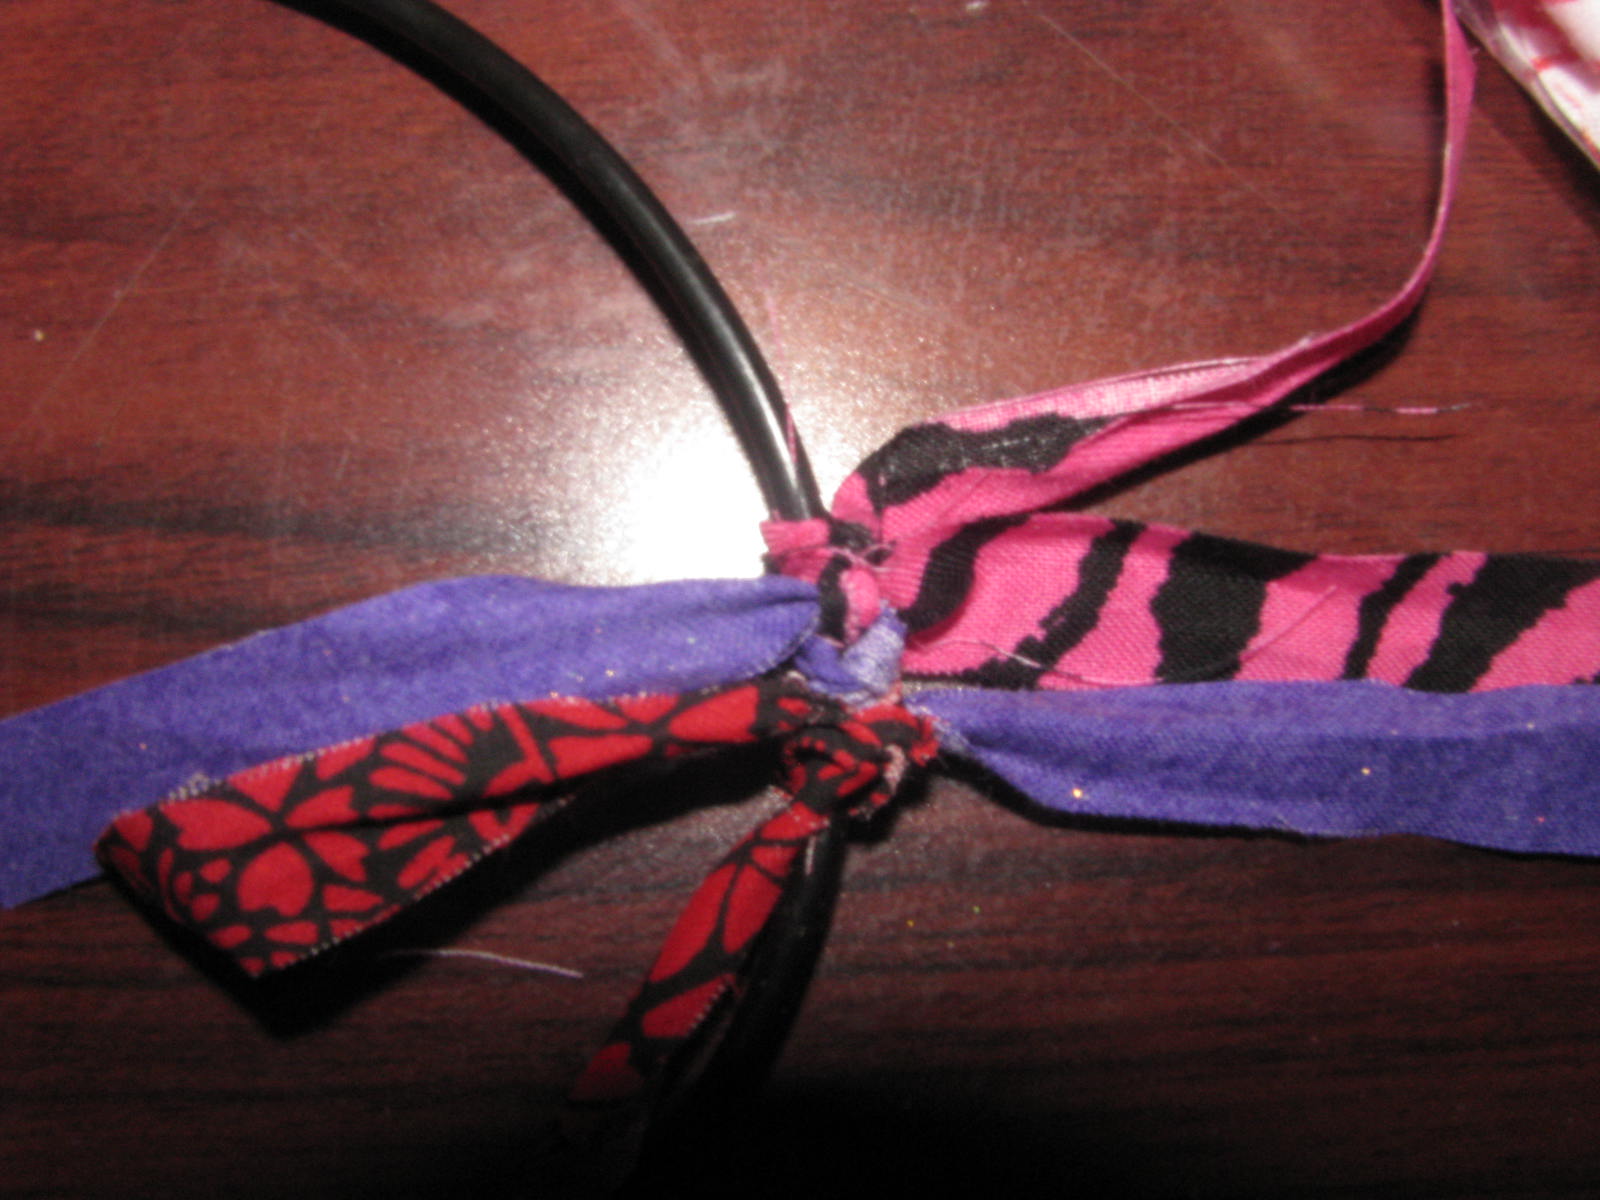
Next, you'll take your thin heart shape and start tying the fabric around it. Pick your 1st strip, tie it onto the wire frame using a basic Overhand Knot.

Take your next strip, tie it on with another overhand knot.

Now, take 1 end of each of the tied-on strips, and tie those ends together using an overhand knot.

And contiue adding more strips and tying 1 end of the new strip to the end of the last strip you tied.

When you tie the strips together, it secures the knots, and the strips on the wire. It also adds a more "scattered" look.

And, don't worry about fraying, that just adds to the look.

Once you're all done, tie a ribbon at the top and hang it on your door!!