Showing posts with label Gift Things. Show all posts

Saturday, September 24, 2011

Wedding Letters

So, since we've been married, most of The Mr's friends have gotten married and people from our single's ward have gotten married, and family members have gotten married.

I'm always in search of a cute easy gift to give. I've found a few that work pretty good, but recently found one that I LOVE!! I love making it and I love sharing it with newly-weds!!

I call them Wedding Letters.

When I first got married I was completely obsessed with my new last name! {Ok, truth is, I'm STILL obesessed with my new last!!} I was putting C's on everything, I was Mod Podging C's like a crazy woman, and putting our last name EVERYWHERE!! {I made some seasonal word blocks with a tutorial from Brown Paper Packages, and I added 2 extra letters so I could spell my last name....}

What you need:
-Cardboard letter
-Paint & brush
-Scrapbook paper
-Mod Podge
-Cheapie cheap nail files
-Ribbon

I go buy a cardboard letter from Joann's, the first letter of their last name. I try to stick with the medium ones I guess, that way it can fit on a shelf and not be too big but still big enough to see.


I have recently fallen in love with a paint color called Antique White. It's not a white-white, but it's also not a tan. I love it! It matches my "wedding pack" of paper PERFECTLY!! I paint the entire letter with a coat of Antique White. Insides and outsides, front and back!

Once dry, I flip the letter over, and trace the outline on the back side of the scrapbook paper. When you cut it out, cut on the INSIDE of the line, when you trace it, it always ends up bigger than the letter actual is.

Now, take that wonderful goo called Mod Podge and put a nice coat on the front of the letter. Place the letter cutout and smooth it onto the front of the cardboard letter.

This is where your cheapie cheap nail files come into play. I buy the big huge pack of 100 assorted nail files from the dollar store.

Once my paper is secured and dried to my cardboard letter, I always notice I didn't do a very good job tracing or cutting or lining up the traced letter to the cardboard one. I always have edges hanging over. I take the nail file, and file down the paper at an angle. I get paper dust all over, but the end result is pretty nice looking. ***Be sure to file down the paper BEFORE you put a top coat of Mod Podge on!***

This step will take quite a few of the cheap nail files, I use each end, both sides and each middle. I went thru 3 per letter.

Now, once the paper the filed down, I apply a coat of Mod Podge to the top of the scrapbook paper. I'm always careful to get the corners of the paper.

I've also recently fallen in love with antiquing things using brown or black ink pads. I take either the ink pad itself or a piece of paper towel/kleenex and press it into the ink pad then swipe it acorss the letters. I used the ink pad itself on the H, but the C and B were hard to get the ink pad into the turns. :) Tie on some cute wedding-ish ribbon, or if you know their wedding colors, tie those on. Brides love that stuff, I know I did!

And viola! You have some adorable, non-expensive gifts to give to some newly-weds!! The neutral color scheme goes with most decor, that's why I usually go with black, white, silver, cream. :)

Enjoy!

Wednesday, September 21, 2011

Pee Pee Tee Pee

So, I've got 2 months left until Little Man gets here. And I have been scouring the web (blogs and Pinterest) to find little things to make. I found a bunch of burp cloths {more on those later!} but I also found these!

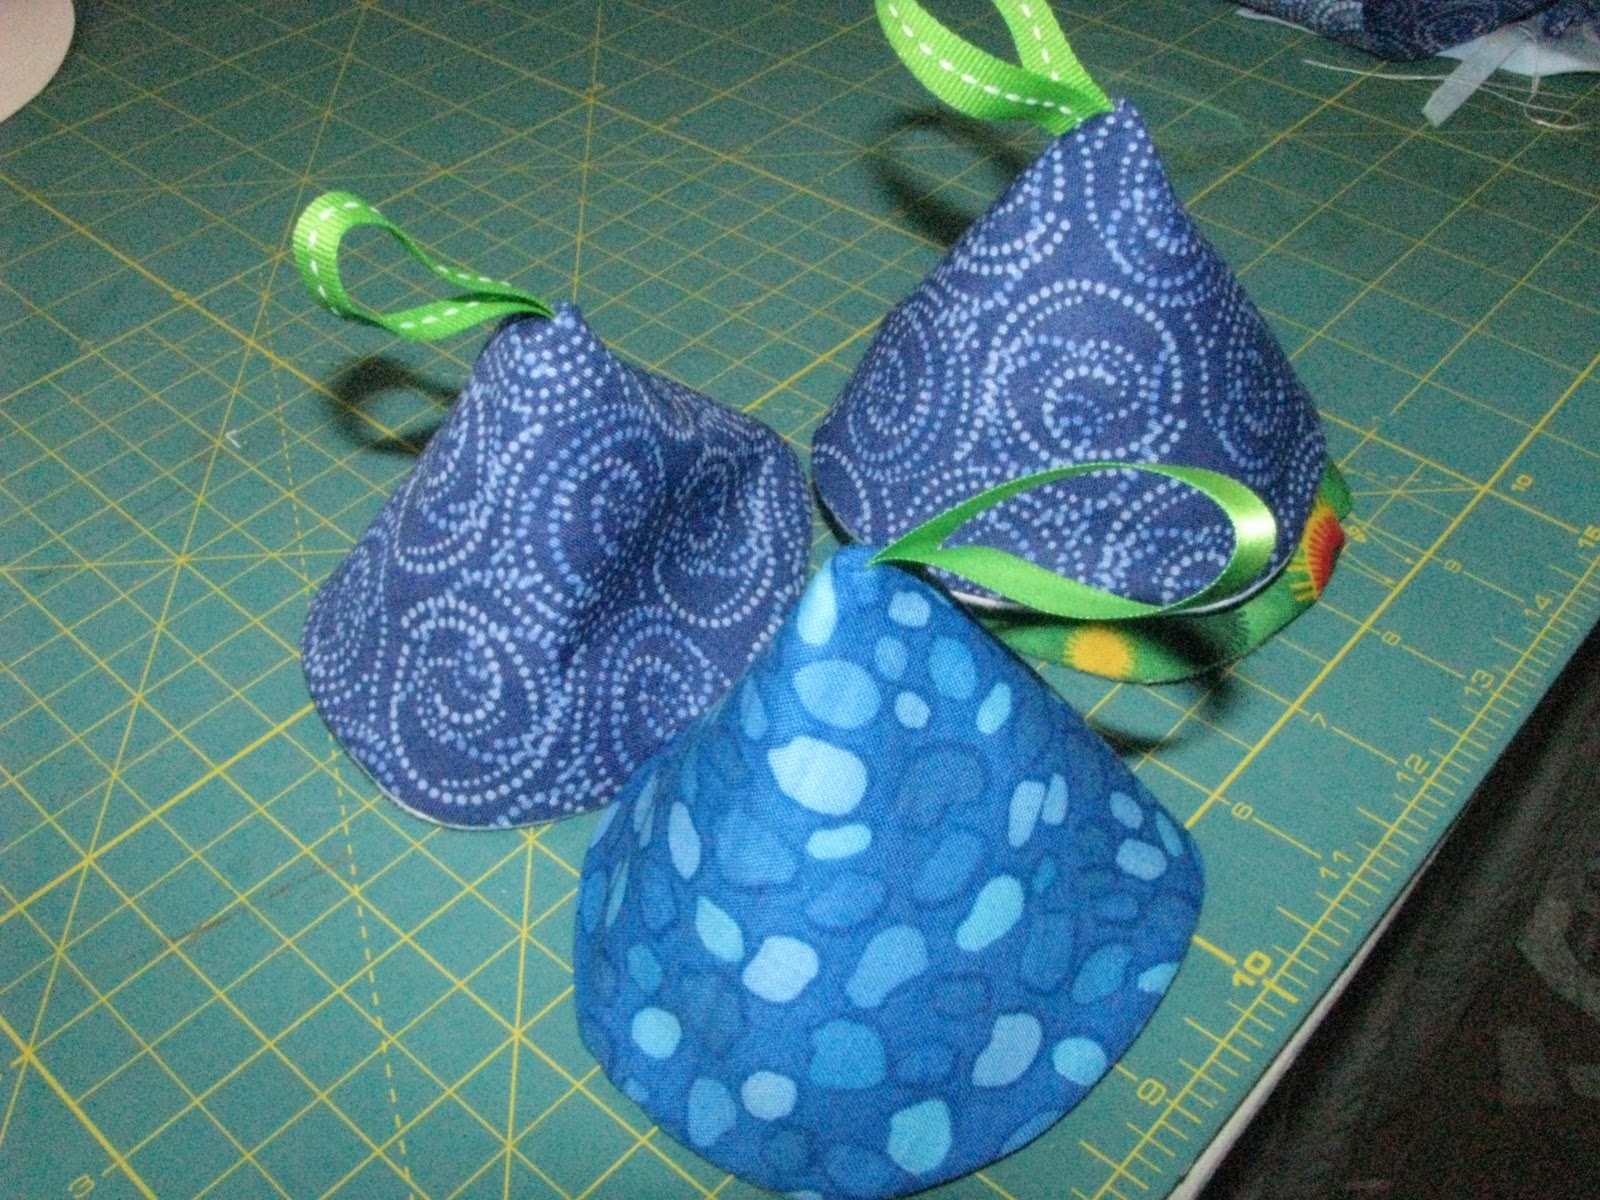
Pee Pee Tee Pee!! Or Wee Wee Wigwams, whichever you prefer!

So I made a whole bunch! There are lots of babies coming the next few months and most are boys! So I made some for me, and some for all the ladies I know having boys! The Tutorial was so simple and easy. I found some flannel on the Remnants rack at Walmart, and picked up some cute fat quarters.

The tutorial was way easy to follow! I found it over at Make It and Love It. I found the tutorial via Pinterest.

These were so easy to make, I cranked out 2 burb cloths, a onesie, 4 Wee Wee Wigwams, paid my bills, AND went grocery shopping today!! ;)

Head over to Make It and Love It and start making Pee Pee Tee Pee's for all the ladies expecting little guys! They're a great gift and they're sure to make the girls laugh! :)

Thursday, June 2, 2011

Ribbon Flowers

Ok. I don't have kids (YET!!) but I have been making these Ribbon Flowers for over a year. I made some last year for my niece for Christmas.

What you need :
  1. Ribbon (Cute! Grosgrain or satin, either works!)
  2. scissors
  3. lighter
  4. thread
  5. needle
  6. buttons
  7. aligator clips
**My Picasa-to-blogger upload is wigging out again, sorry I can't seem to upload the photos to be the right way! Sorry! I've tried, I really have!!**

First, take your way cute ribbon and cut (5) pieces all measuring 2.5" long.

Now, take each piece and singe the cut edges with a lighter so they don't unravel.

Next, take 1 piece and fold it like a hotdog bun (longways) and go around the very top of the middle with the thread and needle to secure the 2 sides together.

DON't CUT THE THREAD! Now, fold up ONE of the side of the ribbon to meet the thread and needle, and go once thru (out and in) the face of the ribbon and tie it the thread in the middle where you secured the 2 sides together.

It'll look like an "L" - Do this to all 5 pieces of ribbon.

Now, you are going to fold the ribbon in half short ways (hamburger bun) so it will look like a house, or a flower petal!

Take the needle (I choose long needles) and weave the flower petal onto the needle. DON'T PASS THE NEEDLE ALL THE WAY THROUGH, so you can just pull the petal off the needle if it folds funny.

This one takes me the longest, I can never seem to get it to fold right.

Make sure the dot of thread on the face of the ribbon (from photos 4 & 5) is on the "bottom" of the petal.

Now, take the other 4 petals and thread them on the needle, weaving in the petals on so they fold cute and the dot of thread is on the bottom of the flower.

The photo under this is showing the bottom. If you look close you can see the dots of thread.

Now pick a cute button to sew in the middle of the flower, make sure it's secured really good.

Get your alligator clip (I get mine from the dollar store (they come with ribbon on them!), or from Sally's and glue ribbon on them.

Clip them onto your way cute headbands!

Make one for every outfit!

TA DA!

Want to learn to make more?! Go to http://www.hair-hardware.com/ and go to the bottom of the page. They've got all kinds of cute bows to make!! ♥

Saturday, May 14, 2011

Mother's Day Gifts...Finally

Ok, so since my Mother's Day was overshadowed with electric shock treatments and new double dose shots, I didn't have time to get my Gifts done.

{In reality I probably should have started these the week BEFORE Mother's Day, but my brain has been all over the place. I'm usually on top of these things!}

So, I work at a home decor store. And we've got some pretty cute stuff. I usually don't see what we have until someone brings it up thru the registers. I saw a little hand stictched sign that I fell in love with.

It said : Grandchildren are God's reward for not killing your kids.

My mom makes jokes about living long enough to be a problem to her kids. So I figured this quote would be perfect for her.

I rummaged thru my box of frames. Picked out 2.

I spray painted them white. {I'm usually a black frame person, but my black was gone and I'm pretty impressed with how the white turned out.}

I then cut out the wording in vinyl on my Cricut. {I have over 500 fonts, so this actually took some time. And once I start looking at different fonts, I start to wonder if that's how "reward" is really spelled. Does that happen to anyone else?!}


Next I took a pliers and yanked out the little metal tabs that hold in the backing of the picture, washed the glass and hot glued it into the frame.

I centered my vinyl, and stuck it on.

And since most frames have the "hanger" part on the cardboard backing, I Gorilla Glue'd some ribbon onto the back. {Gluing ribbon on the back makes it hang more even, and it easier to level on a wall.}

I printed out some of the ultrasound pics and put them in a frame to give with the quote.

TA DA!!