Showing posts with label Decor Things. Show all posts

Friday, April 6, 2012

Easiest Easter Blocks Ever

So I have been the lamest crafter ever. Ok, so I've been crocheting like a mad-woman {cuz I don't have to leave the couch...} hey, my baby has been sick! But I haven't been doing a whole lot of crafting and sewing.

But a while back I went to Target {Oh, I love that store.} And every time I go there I go specifially for the Dollar Section. Well, anyways, while checking the bins in the $1 Section, I found these SPRING blocks.


I had an idea. I'm all about multi-purpose decor, as you can tell by my seasonal word blocks. I counted it out, and there are the same number of letters in EASTER as there are in SPRING. {Yes, I stood there in the aisle and counted the blocks to make sure my idea would work.} So I decided today was the day, 2 days until Easter, and I was finally going to do my project. I measured and cut out the word EASTER in white vinyl.

Then turned the blocks for SPRING around and stuck the vinyl letters on so all I have to do is spin each block around so it says Easter!


Easiest craft ever. Maybe I'll eventually get around to making my St. Patrick's Day/Valentine's Day blocks... Did you know that St. Pat's and Valentine's Day have the same number of letters in them?!

Ta Da! So easy and cute! And those blocks only cost $2.50 in the Dollar Section! Awesome! Now If I can just remember to take them out every year!

Wednesday, October 26, 2011

Food Soap Baby

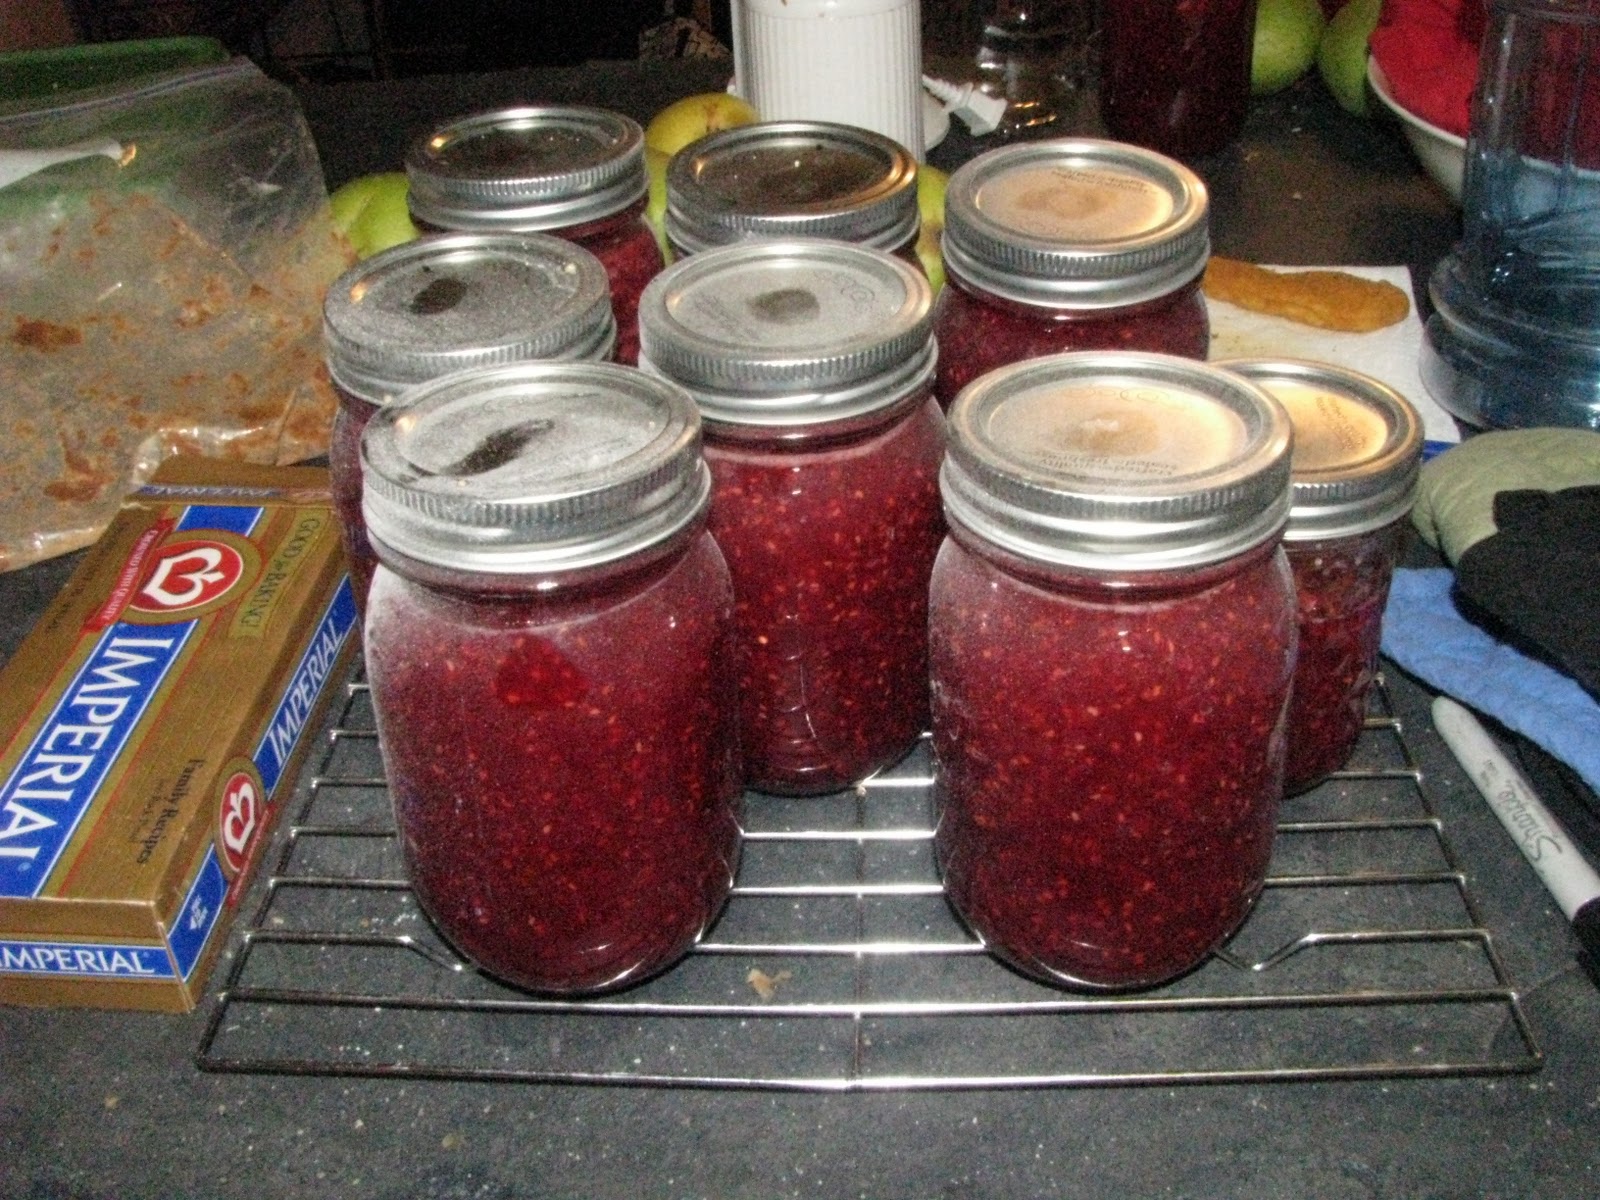
I made Pear Raspberry Jam. It tastes really good, I can't really taste the pear, but that just means the next batch will have double the pear in it. ;)

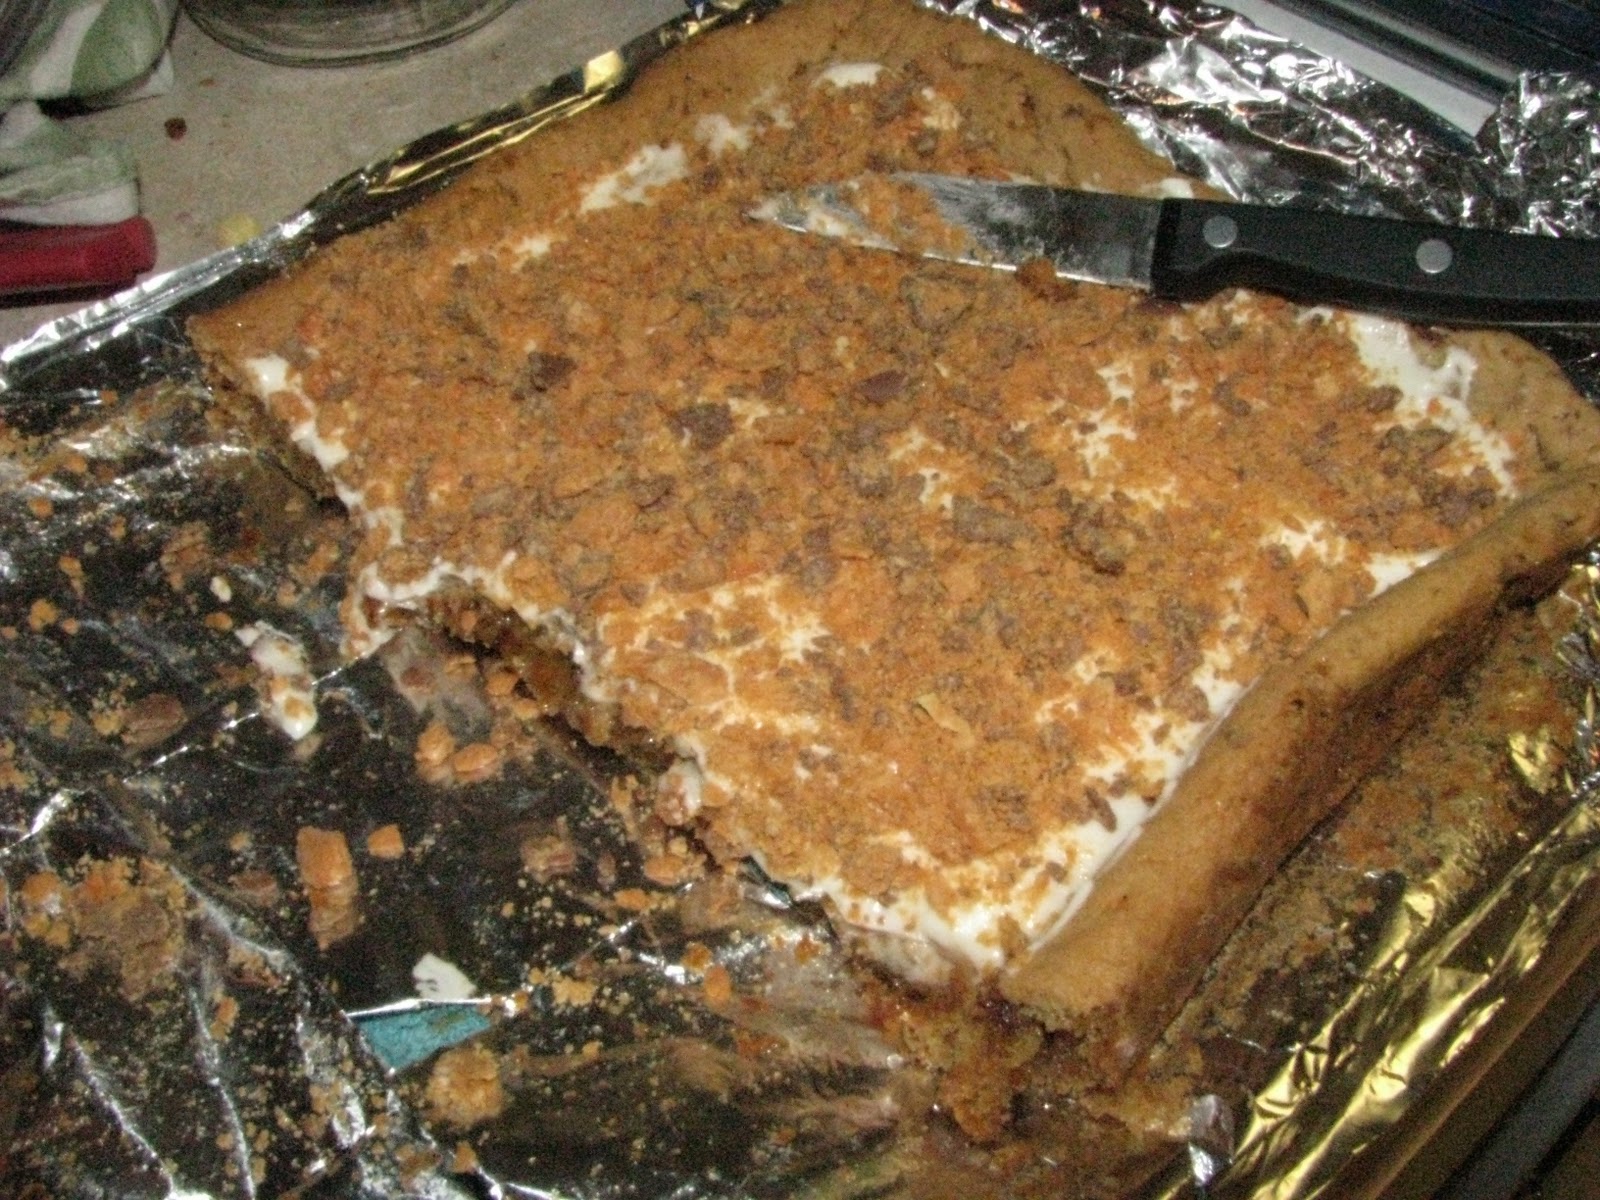
I made Butterfinger Blondies. I was so excited to try this recipe because I found it on Pinterest (and I've been working at MAKING things from Pinterest, not just pinning things!) and beacuse I LOVE Butterfinger! These blondies tasted amazing, and the buttercream frosting with the Butterfinger on top way absolutely delicious. The blog this recipe is posted on has TONS of amazing looking stuff, so stop over at SixSisters'Stuff! The Mr. love them!


I made laundry soap. Yeah I know, I'm ever so ambitious! BUT, I seriously can make a TON of laundry soap for way freaking cheaper than buying even a small bottle. So, I have my soap making pot, grater, funnel and spoon. Plus, to make this first batch of soap, I had everything on hand. Sweet deal, huh! So yeah, I bought a 2.5 gallon water dispenser with a spigot to dispense the detergent. The recipe over at WhyNotSew said to put the detergent in 2 milk jugs, but I wanted something easier to get the detergent out (I can lift the spigot and pour soap into the cup ONE-HANDED!! So easy!)

I've made up some of the nursery decor. I've had these frames from work but they had some odd artwork in them that really wouldn't fit with any nursery scheme I could have come up with, I really bought them because of the blue frames. I got TONS and TONS of blankets and I decided to fix up the artwork.


So two weeks left until Little Mr. comes. So yeah, now we're just waiting 14 more days until our cute little man gets here. We're hoping he waits that long. {please wait that long!!}

Saturday, September 24, 2011

Wedding Letters

So, since we've been married, most of The Mr's friends have gotten married and people from our single's ward have gotten married, and family members have gotten married.

I'm always in search of a cute easy gift to give. I've found a few that work pretty good, but recently found one that I LOVE!! I love making it and I love sharing it with newly-weds!!

I call them Wedding Letters.

When I first got married I was completely obsessed with my new last name! {Ok, truth is, I'm STILL obesessed with my new last!!} I was putting C's on everything, I was Mod Podging C's like a crazy woman, and putting our last name EVERYWHERE!! {I made some seasonal word blocks with a tutorial from Brown Paper Packages, and I added 2 extra letters so I could spell my last name....}

What you need:
-Cardboard letter
-Paint & brush
-Scrapbook paper
-Mod Podge
-Cheapie cheap nail files
-Ribbon

I go buy a cardboard letter from Joann's, the first letter of their last name. I try to stick with the medium ones I guess, that way it can fit on a shelf and not be too big but still big enough to see.


I have recently fallen in love with a paint color called Antique White. It's not a white-white, but it's also not a tan. I love it! It matches my "wedding pack" of paper PERFECTLY!! I paint the entire letter with a coat of Antique White. Insides and outsides, front and back!

Once dry, I flip the letter over, and trace the outline on the back side of the scrapbook paper. When you cut it out, cut on the INSIDE of the line, when you trace it, it always ends up bigger than the letter actual is.

Now, take that wonderful goo called Mod Podge and put a nice coat on the front of the letter. Place the letter cutout and smooth it onto the front of the cardboard letter.

This is where your cheapie cheap nail files come into play. I buy the big huge pack of 100 assorted nail files from the dollar store.

Once my paper is secured and dried to my cardboard letter, I always notice I didn't do a very good job tracing or cutting or lining up the traced letter to the cardboard one. I always have edges hanging over. I take the nail file, and file down the paper at an angle. I get paper dust all over, but the end result is pretty nice looking. ***Be sure to file down the paper BEFORE you put a top coat of Mod Podge on!***

This step will take quite a few of the cheap nail files, I use each end, both sides and each middle. I went thru 3 per letter.

Now, once the paper the filed down, I apply a coat of Mod Podge to the top of the scrapbook paper. I'm always careful to get the corners of the paper.

I've also recently fallen in love with antiquing things using brown or black ink pads. I take either the ink pad itself or a piece of paper towel/kleenex and press it into the ink pad then swipe it acorss the letters. I used the ink pad itself on the H, but the C and B were hard to get the ink pad into the turns. :) Tie on some cute wedding-ish ribbon, or if you know their wedding colors, tie those on. Brides love that stuff, I know I did!

And viola! You have some adorable, non-expensive gifts to give to some newly-weds!! The neutral color scheme goes with most decor, that's why I usually go with black, white, silver, cream. :)

Enjoy!

Wednesday, July 27, 2011

Pinwheel wreath tutorial

**Sorry I've been away lately, I've had a few compliations with the pregnancy and my heart, but right now, everything is back to normal-ish. At least steady.**

Alright, so I've had an itch lately.

I've been wanting to make a new wreath for my door.

Not a fancy one or anything, just a summery one.

I bought tons of pinwheels at Dollar Tree last year, hopeing to make a wreath. My first idea never turned out the way I wanted it to, so I gave up last year, putting it off until we got our own door and I could think of a better idea. I bought all the supplies for a pinwheel wreath.

This year it hit me.

I decided to wrap yarn around a floral wreath, and then stick pinwheels on that.

What you need :
  1. floral wreath (Dollar Tree)
  2. Yarn (I have a stash)
  3. Pinwheels (Dollar Tree)
  4. Hot glue (stash)

First, take your yarn and tie it around the wreath. Start wrapping yarn around the wreath.

I would twist the yarn after I looped it around the wreath. I twisted the yarn so it was a tighter wrap and there weren't any spots where the wreath was showing.

Now, if you're like me and don't know you're own strength, you might end up breaking the wreath at the seam {oops} I was thinking of hot gluing it, but hot things have never worked on the floral foam wreaths for me, so I duct taped it. I wrapped the yarn around the taped seam so nothing showed and you can't even tell I broke it!

Now, I teased my dog with the wreath while my husband cut the pinwheels.

I had him cut the pinwheels sticks short, but with some stick left still. In the end, I cut all the way up to the 90 degree elbow.

Then I put hot glue ont he elbow and stuck them on the yarn wreath.

I made sure they didn't touch, so in the event I get a breeze here, they will spin and not hit eachother.

I debated on adding a ribbon to hang it from, but decided against it, I can never get my wreaths to hang flat on the door when I put a ribbon on, so I just set it on my wreath hook.

Enjoy your wreath for the rest of the summer!